Friday, November 13, 2009

Homemade Potato ...er, I mean Turnip Chips

A couple of days ago, I picked up my son from school, and immediately upon climbing in (amid my usual, "Come on, there's a long line!") he excitedly hands me a note. Like most things he brings home from first grade, it's rolled or folded into the smallest package possible. Maybe he thinks that makes it easier to carry. I unfolded his note and read the precise school teacher handwriting which said, "Recipe for turnip chips?"

Hmm.

I had never actually made turnip chips before. It was time to ask the boy. It went something like this:

Me: Am I supposed to find a recipe for your class? Are you studying turnips?

Boy: My teacher wants the recipe you make. I told her about it.

Me: But I've never made turnip chips.

Boy: You know, the ones you make where some are really crispy and some are really soft, and they're really delicious. Those turnip chips.

(I must interject here. What mother doesn't glow when her son waxes poetic about a vegetable?)

Me: Oh -- you mean the potato chips I make?

Boy: Those are potatoes?

This went on a while, and we ended up deciding to roast some turnip chips. The original potato recipe isn't something I would have blogged about. It's not really even a recipe; I just slice potatoes and roast them. But here goes -- this is for the boy:

I peeled three turnips, and sliced them into rounds. I do this by hand for two reasons: I like the rustic look of irregular slices, and the way they cook up (that's what the boy meant when he said some were crispy and some were soft); and just looking at my mandoline makes my fingers instinctively curl up in self-preservation mode.
I toss them in a large bowl with 3 Tablespoons olive oil, salt and freshly cracked pepper, and dried thyme. Any combination of dried herbs will work here. (Rubbed sage might be great this time of year, Herbes de Provence would be nice earlier in the season...go wild.) Use a large enough bowl to really throw them around. It's not a bad idea to reach in there with your hands and make sure all the slices are seasoned on both sides.


I spray a baking sheet with non-stick spray, and arrange the slices as evenly as possible. They will overlap a bit; just let them.
Roast them at 375 degrees. After about 15 minutes, rotate the baking sheet. After another 15 minutes, turn the "chips" over with a spatula, then roast 10 or 15 minutes more. They will shrink up quite a bit.


These chips don't quite make it to crispy. They are so absolutely delicious, however, that it doesn't matter. The slow-roasting brings out incredible sweetness and the caramelized edges develop a lovely chewiness. Now that I know how they behave with this treatment, I can't wait to fan them out over a serving platter and top them with grilled fish. Or roasted chicken. Or whatever.


Wednesday, July 8, 2009

Okay, so I love eggs.


What's not to love?


Unless you're my husband, of course, who has unfortunate reactions to their visceral, earthy aroma when cooking. (Too much like a ... you know. The polite word we use with our 6 year old is "toot") (Month of Suppers, Day 19)

But is there anything more satisfying? Not to a mama and her boy when Daddy is at a conference!

I had a semi-complex meal planned, and my son announced his great idea. All of the sudden, discussion was over; boiling, peeling and mashing were in order.

The first picture is of David's egg, peeled by his hand, on one of his favorite John Deer plates. (I was afraid he might not like egg salad.) But something magical happens when a child helps mash together ingredients...he will actually taste it!

And tonight -- he liked it.

(I look high and low for a ripe tomato, but no luck tonight. I did add some fresh dill -- a perfect punch of flavor.)

Tuesday, June 30, 2009

Month of Suppers Project

Day 5: Grilled chicken over jasmine rice topped with avocado-corn-tomato relish,
with green beans, crisp green salad and buttermilk cornbread

This is day 11, and I'm more and more impressed by E.F.'s tenacity!
He has been creating dolls, while I'm shooting for a month of creative meals -- hopefully with no repeats. I can see why he used the term, "creativity boot camp." The biggest challenge so far has been to deal with left-overs. Like most families, every 3 nights (or so) we usually make a meal out of them. Frugal? Time saving? Fridge de-cluttering? All the above. For now, I'm either serving left-overs for lunch, or freezing them. I really must work on cooking for 3!

Follow me on twitter (eatwellathome) for daily updates. Photos and brief descriptions are on my flickr site here.

Monday, June 22, 2009

Blessed Cornbread Suppers


I'm lucky to live in Lexington, Kentucky. Sure, there's all that bourbon and horses stuff. But a less publicized jewel in our crown takes place every Monday night on Campsie Place.

There is no need for me to tell the Cornbread Suppers story. Rona explains it beautifully here. It's a glorious thing Steve and Rona do, week after week. Those of us who hunger for a little fellowship, a little comfort or stimulation, and of course -- food, show up. With or without a contribution, we are welcome. We are nourished.

Our hosts make lots of cornbread (usually advertised in advance on facebook), and guests bring a dish (or not -- no pressure). Rona has a small pad of paper conveniently at the ready, and we label our contributions as we set them on the large table in the dining room. Tonight we tasted Rona's fabulous cornbread with garlic from Blue Moon Farm (vegetarian and bacon-y version available),

Red and golden beets, and much more:

The buffet table overflowed tonight with pesto pasta salad, whole wheat fusilli, fresh green salad with balsamic vinaigrette, roasted pork loin, apple pie, watermelon soup... truly a feast.

Thank you S and R for such a generous community spirit!

Saturday, June 20, 2009

Inspiration

This article (Or rather, this person) has inspired me. I'd like to jump in and say/do something equally grand, but I know myself. I will start with baby steps.

Besides the fabulous community-spirited and generous nature of EF's project, I am impressed by the commitment he has kept. If I did anything every day for a month, it would be a great achievement. Blogging is a sporadic activity. Eating, however, is something I do every day.
My husband has said that he has never eaten the same meal twice since being married to me. I'm hereby challenging myself: I will post every evening meal my family has for one month, via this blog or twitter -- (let's face it, not all meals are fully blog-worthy and should be limited to 140 characters!). This will be "warts and all." I promise to admit to those jaunts out for Mexican, and you may even be disheartened by a frozen lasagna saga. My goal here is to document how we really eat at home. I hope it turns out "well."

Let's get this party started!

Tonight: Marinated Flat Iron Steak, grilled to Medium-Rare, and thinly sliced across the grain:

Zucchini and summer squash, diced and sauteed in olive oil with garlic, grape tomato and fresh basil (from the garden!),

Baked potatoes, rubbed with olive oil and kosher salt.


A bit later:

Sliced strawberries macerated in a tad bit of sugar, served with vanilla bean ice cream.

Follow me on twitter at "eatwellathome" keep me accountable! If I can do this, bigger and better things are to come!

Tuesday, June 2, 2009

Pommery Mustard Redux

I'll say it again. This is the best mustard in the world.

For a wonderful and easy sauce, add 2 Tablespoons Pommery Mustard to 1/2 cup heavy cream. Bring it to a boil and let it roll...

until it reduces and thickens to a creamy consistency which will coat the back of your spoon. Remove from heat and add fresh dill. (Oops, I didn't measure my dill. 1 -2 teaspoons and you can't go wrong...)


This sauce is delicious on grilled chicken, roasted asparagus, a spoon... I ladled it over broiled Atlantic Salmon.

Now I have a real dilemma. Will someone please come to my rescue?

Monday, May 25, 2009

One of my favorite places...


On East Maxwell Street in Lexington, there is a piece of heaven.

The fabulous greenhouses of Michler's Florist have been blessing this area for 107 years and counting. Read all about their rich heritage here. This post is about the experience that a simple visit to Michler's can provide.

When we make a trip to Michler's, I usually chant the "I look frightful, hope I don't see anyone I know" mantra. And with bits of dirt and sweat streaking through my sunscreen, I tuck my messy ponytail under my garden hat and face the music. Inevitably, I run into people I haven't seen in forever.

But an enchanting spell has been cast over the entrance, and all who pass through are transformed. We become bonded together as Keepers of the Earth. Total strangers (and those people I haven't seen in forever) share gardening hints, tell stories about their favorite plants, talk about the pesto still in their freezer from last summer's basil harvest... Time slows to a crawl. Everybody loves everybody.


I stroll through the never-ending maze of greenhouses, suddenly quite sure that I am capable of nurturing such a healthy, lush garden. This heavy dose of inspired confidence shocks me back to reality, but not before I've fantasized about giving up everything material, joining a commune, and just growing stuff.


We wanted at least one of everything, but stayed strong and focused on tomato plants and herbs. For now. I'll need another dose soon.

Saturday, May 16, 2009

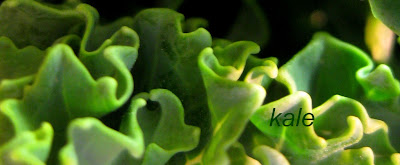
Kale (my way)

I love me some kale.

Not the soft, tender kale with bacon fat so customary on soul food and comfort food menus. (Not that I haven't bellied up to that counter more than once.) I want my kale to have a little fight left in it. A little less fat. Tons of flavor. And I ain't afraid of that other F word either. (Fiber -- what were you thinking?)

If you've been known to reach past the velvety, baby spinach leaves for that wrinkly, full-bodied curly spinach, then keep reading. This toothsome recipe is for you.


Clean and dry one bunch kale, and discard the thick center stems. In a hot pan, drizzle about 2 TBL olive oil. Let it get hot, and then add as much kale as will fit. Turn it over with tongs, and as it shrinks in your pan (amazingly, I might add) add the rest of the kale.

After about 5 minutes on medium heat, clear a spot in the middle to add 1 - 2 cloves chopped garlic. (I usually add a bit more olive oil with it.)


Once the garlic is golden brown, sautee everything together, adding salt and fresh cracked pepper to taste. (It's dangerous to salt kale too early -- the sheer volume at the start practically guarantees over-salting.) When the bottom of the pan developes a good color, you know it's time to de-glaze.

I used about 2 TBL balsamic vinegar, and a dash of hot sauce isn't a bad idea at this point.


The finished product...

If you don't enjoy quite so much of that delighful texture, top it with a lid after the de-glazing, and let it steam in very low heat for 5 - 10 minutes. Enjoy!


Garden Updates:

Still cleaning up and discovering what has come back. I found this dill...


the sage flowers


Here is the herb garden, ready for new plantings.
The weeds and thistles filled my wheelbarrow (but not my assistant's...hmmm). Here is a newly-tilled patch, ready for tomatoes and...we'll see. I'd better get busy -- as usual, I'm a little late.

Saturday, May 9, 2009

My Garlic Jar

This little jar is one of my most favorite things.

When I moved from New York to Seattle years ago, I took what I could carry with me on Amtrak, and I also stuffed a few large boxes to follow me via UPS. As you can imagine -- pots, pans, and other matters culinary were not the bulk of "what made the cut." As I finally got settled, it was like starting from scratch when it came to my little apartment kitchen. What fun that was. Really.

There was a fantastic business in my Capitol Hill neighborhood called Chicken Soup. Donated items were sold and the proceeds went to support AIDS patients in the area. Someone had donated a set of glass canisters -- in graduated sizes -- and I just had to have them all. One for pasta, one for rice, one for flour, one for sugar... The price was right. It was for a good cause. And they were so darned sweet! But I'm getting too far from my topic.

This jar was the smallest of the bunch. It's plain old glass; nothing fancy. The little dome lid fits perfectly inside the lip. It doesn't have a rubber seal to retain the garlic ... perfume. There are only 2 ingredients that ever go in it -- real chopped garlic and olive oil.

I'm not talking about that pre-diced stuff you find at the store (laced with who knows what). Frankly, that doesn't taste remotely like the real thing. It may even suffer from CAS (Canned Asparagus Syndrome -- the canned stuff becomes different enough to actually be considered a separate food). And it's packed in a watery, briny liquid. Water and oil don't mix. Think about that when you're adding that wet stuff to hot oil in a saute pan. One more negative: it's too finely minced. There's no wiggle room to play around with the strength factor. (A larger dice will tolerate more time at center stage in your saute pan, allowing a milder, sweeter flavor to develop.) About once a week I chop a lot of garlic, put it in my squeaky clean jar, and top it off with extra-virgin olive oil. I keep it in my fridge, and every time I get to cookin' -- out she comes. Need a bit of fresh garlic? Need a drop or two of garlic oil? No problem.

I fight the urge to keep it on the counter. I love to look at it, sitting pretty next to my favorite pepper mill and my olive oil carafe with the shiny stainless steel pour spout. But I'm heartless; I stick it in the cold, dark fridge. Refrigeration does solidify the oil a bit, but a minute or two at room temp and she's back in business. Plus, it's hardly worth playing around with the whole botulism thing. Once the garlic is covered with oil, it becomes anaerobic (no air is moving around it), and that means refrigeration is key. Keep it fresh, keep it cold, and keep yourself alive. If I'm not going to be using it as quickly, I sometimes skip the oil and store it dry. Works great -- I just don't have any oil to drizzle about.

I love my little garlic jar. It has a wide mouth -- I can easily fit a soapy dishcloth into it. It's glass -- I can put it in my dishwasher. There isn't a speck of plastic or rubber to retain any smell -- not that I mind, but the whole squeaky clean thing is important to me (did someone say OCD?). About once a week I start fresh. All the oil and garlic get thrown into a dish that can take it, the jar gets back to squeaky clean, and then the wonderful chopping and filling process begins again.

Rachel Ray can have her garbage bowl. I wouldn't trade my precious garlic jar for anything.

Tuesday, April 28, 2009

Springing into the herb garden...

This is going to be one of those posts without recipes. Lazy perhaps, but a little brave, because I am going public with my "before" picture before I've snapped the "after". I work much better under pressure.

After a winter and early spring of neglect, here is what my poor little herb garden looks like. Warts and all.

This spearmint is coming back nicely; no surprise there. Especially outside the make-shift brick border (which seemed like such a good idea last summer). Again, no surprise there.


Welcome back lovely sage! This looks like it is getting ready to bloom, and I need to decide if I should let it. It was planted after the spring last year, and I think this is the first time I've had sage come back (I haven't grown it often)...stay tuned!

My dependable thyme.

This voluptuous lavendar amazes me every year. It turns from silvery-gray to green without dropping so much as a needle. I'm almost afraid to touch it -- the stones under it have been there much longer than I've been admiring it. Luckily, it appears to thrive on my neglect.

This patch already smells of chocolate -- the chocolate mint is spreading like...well, mint. I may need to transfer this to a container. I'm also thinking of "gifting" some of it... (fair warning!)


If you're wondering why my herb garden isn't further along, here are a few photos of my springtime distractions...


"After" photos soon. And perhaps a recipe as well. Happy spring!

Tuesday, February 17, 2009

Sesame Vinaigrette

Sorry. I ate it all before I could get a picture. It didn't even get to a plate. I think salad just tastes better right out of the bowl anyway.

I've been buying spring mix at Sam's lately. A person really can't eat too much salad, right? I love sesame vinaigrette, and until recently I've mixed it in a bowl, tasting and adding a little of this, and a little more of that. As a favor to my mother, I finally took notes. Here is a basic, easy recipe:

Simple Sesame Vinaigrette

2 Tablespoons sugar

1/4 cup rice vinegar

1 Tablespoon Soy Sauce

1/8 cup sesame oil

1/2 cup canola oil

I place the first three ingredients in a tightly sealed jar and shake it like the dickens. When the sugar is dissolved, I add the oils and shake some more. Voila! (It will settle -- who cares.)

This recipe has the four corners covered: sweet, salty, tangy and slick (the oils). Don't get me started about those fat-free dressings...boring! If you pay attention to those things (as I should) simply use less dressing on your salad. This is also a great recipe to adapt. Add fresh ginger, garlic, peppercorns, crushed red pepper flakes...go wild.

Saturday, January 24, 2009

Soba

I've had a couple of cravings lately.

Years ago, there was a fabulous restaurant here in Lexington called Ed and Fred's Desert Moon. I used to sneak out the back door of Cafe Jennifer to get my fix of their Chile Lime Pesto Linguine. I'd devour it in the office, check my smile in the mirror for tell-tale cilantro, and then sneak back out front. That's one craving.

Soba noodles have also been on my mind lately. These hearty buckwheat noodles are a great option for those of us who aren't fond of whole wheat pasta (a taste I can't seem to acquire) and still want a healthier alternative to the white stuff.

I haven't been able to get my hands on the recipe Ed and Fred used (help would be welcome!), but I'm pretty sure they used regular linguine. However, I had soba in the pantry, cilantro in the fridge, a lime in the fruit bowl, and a little time on my hands. An experiment was in order.

I had a couple of little red peppers, some left-over pecans, and of course garlic. I gave it all a rough chop, and processed the heck out of it. I added salt and pepper, squeezed fresh lime juice, and drizzled in olive oil as it whirred around my machine.

Sorry -- I experienced a relapse here and fell back into the old habit of not measuring anything. Here are my estimates:

1 cup nuts (I had pecans, but walnuts would be delicious)
1 bunch cilantro, minus a bit for garnish
2 garlic cloves
Juice from 1 lime
Chiles -- I had these mild red peppers on hand, but I recommend using whatever you can take!
Salt, pepper, and olive oil (I used less oil than a traditional pesto because I wanted it kind of on the dry side.)

I had pulled some cod from the freezer earlier, so it was included in this experiment. I sprinkled it with salt and pepper and smeared some of the fragrant paste over it.

I originally set my oven to "broil", but soon realized that the nuts were browning much faster than the fish was cooking. I turned it back to "bake" and started the soba noodles.
I had fun making this up as I went. I didn't want to cook the pesto (surely that would soften that fresh bold punch), but I wanted the soba to pick up some kind of flavor in a saute pan.

So after boiling the noodles in salted water until just al dente, I tossed them with olive oil and sauteed scallions.

I tossed the warm soba noodles with the pesto, placed the fish on top, and we enjoyed a delicious and healthy meal.
I didn't quite capture the linguine from my memory, but that's okay. I'll just call this tasty adventure "Soba Experiment One." Now -- on to the variations!